This drill is currently in the trash and scheduled to be deleted soon
2-1, 4-2 V-Reds
This drill was created using HockeyShare.com's Online Drill Drawing & Practice Planning Platform.
Description
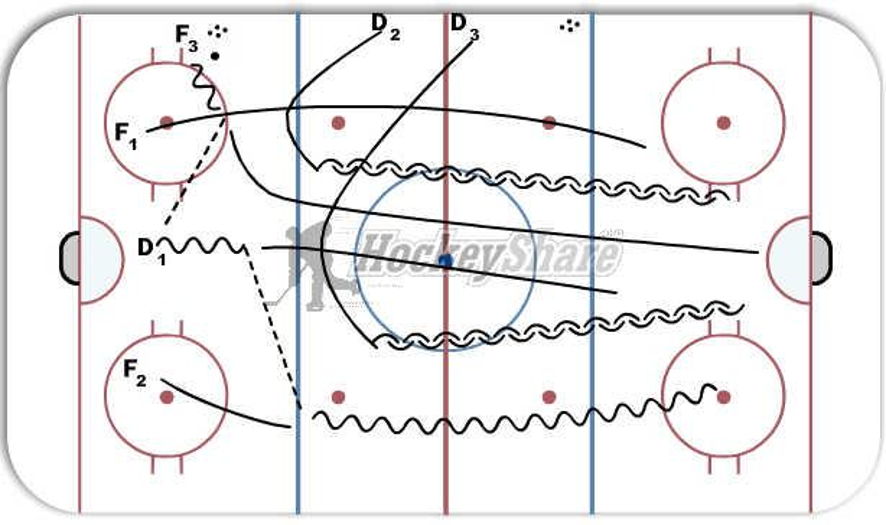
The second part of the drill begins with F3.
F3 - Passes in stride to D1, joins the transition down the ice.
F1 and F2 - Stop and join the rush back up the ice.
D2 and D3 - Follow up previous 2 on 1 and maintain gap for transition.
D1 - Makes a pass to any of F1, 2, or 3.
All three forwards attack D2 and D3, with D1 joining the rush to make it a 4 on 2.
Play is made and shot is taken at the net.
Category: Timing
Tags: Transition
Posted By: unbvreds
(Used in 0 Plans)
Created: 2012-04-20, Last Modified 2013-06-03
 |