This drill is currently in the trash and scheduled to be deleted soon
Back checking / D zone progression
Description
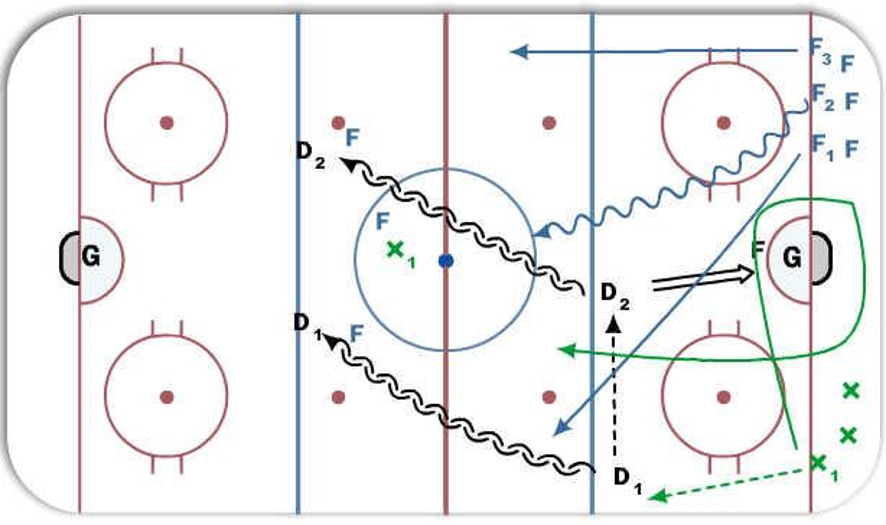
Progression 1:
X1 passes to D1
D1 - D2 - Shot on goal
X1 leaves right after shot and skates around the net
F1 - F2 - F3 leave the zone on a 3 - 2
X1 is tasked in a hard backcheck and must pick up closest F player
D1 - D2 then read and react - stepping up at the blue line
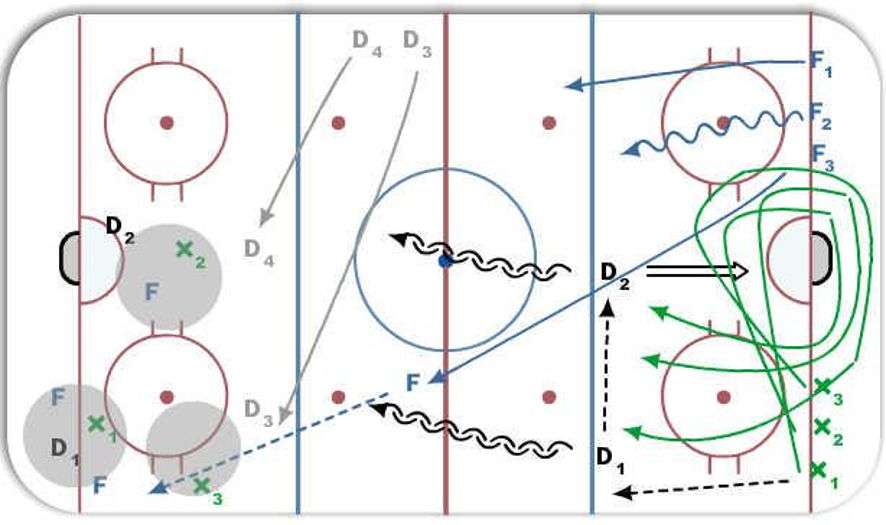
Progression 2:
Same as # 1 but now X1 X2 X3 are all back checking
Once F1 F2 F3 get across the red they dump it in.
D zone then sets up: D1 to low corner X1 to support
D2 to front of net X2 to high slot
X3 to wall
F1 F2 F3 press in 2 - 1 - 2 forecheck
Dig the puck out and initiate break out.
Progression 3:
same as number 2
expect D4 and D3 jump into the play to create 5 - 5 in zone.
Key is to still break out and X3 X2 get to your points!!!
Category: D Zone
Posted By: tobalacrosse
(Used in 8 Plans)
Created: 2015-10-20, Last Modified 2015-10-20
 |