Overload Power Play (Low play switch)
This drill was created using HockeyShare.com's Online Drill Drawing & Practice Planning Platform.
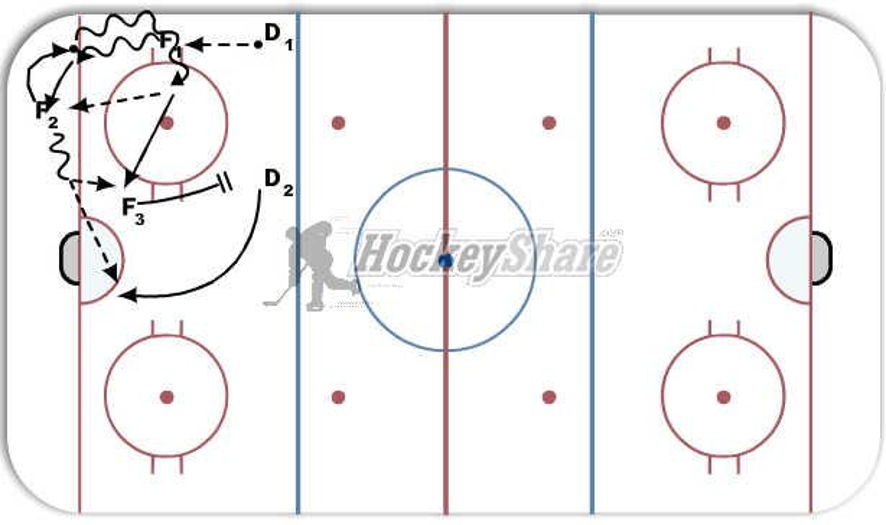
Description
F1 in control of the puck on the half wall. F1 skates toward F2 with the puck on the inside.
F2 skates toward F1 on the outside. F1 leaves the puck for F2 who skates up the boards with the puck and turns to mid ice at the hash marks.
As F2 turns to the middle of the ice F3 backs out of the low slot to the high slot and D2 back doors to the outside post.
F2 passes the puck down to F1 who is now in F2's original position.
F1 walks to the net to hold the goalie on the post and has two passing options: F2 going to the near post and D2 going to the far post.
Notes: The switch adds a different look to this basic powerplay formation. You can also work the switch with half wall forward and D1. Teaching the switch to Atom and PeeWee aged players prepares them for more advanced power play options later.
 |