This drill is currently in the trash and scheduled to be deleted soon
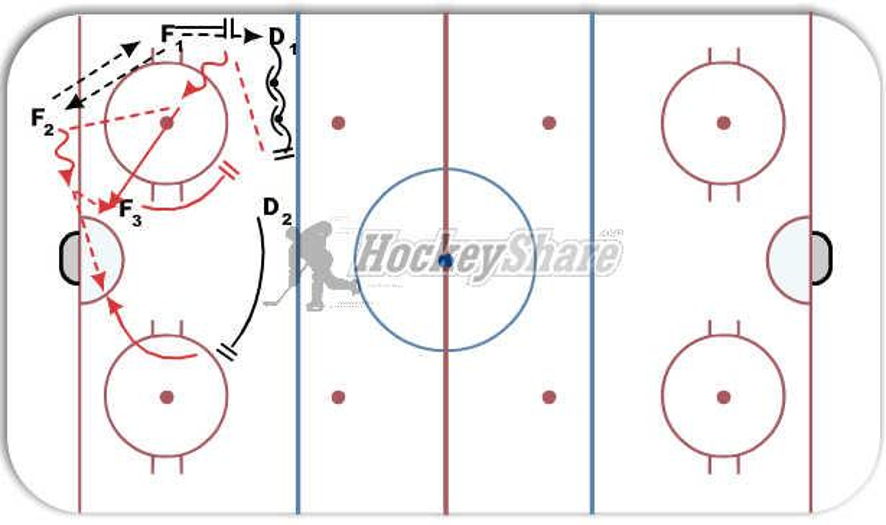
Power Play Overload into Umbrella Low Play
This drill was created using HockeyShare.com's Online Drill Drawing & Practice Planning Platform.
Description
F1 moves puck down to F2
F2 moves puck back to F1
F1 moves the puck to D2
D1 walks the line
F1 supports D1 by moving up the wall and D2 fades wide into umbrella
D1 pulls penalty killer to the middle and passes back to F1
F1 skates with puck toward net and moves the puck to F2
F3 fades to the high slot and D2 backdoors to the far post
F2 walks to the net with two passing options: F1 going near post and D2 on the far post
Notes: In the drill the puck is passed. As players get comfortable, players can begin to run switches high and low to a more complex look and achieve the same result.
Category: Systems
Tags: F1 must support D1 who walks the line
Posted By: coach@*********
(Used in 2 Plans)
Created: 2012-06-01, Last Modified 2013-06-03
 |