3 shot - 3 on 2 Weave
This drill was created using HockeyShare.com's Online Drill Drawing & Practice Planning Platform.
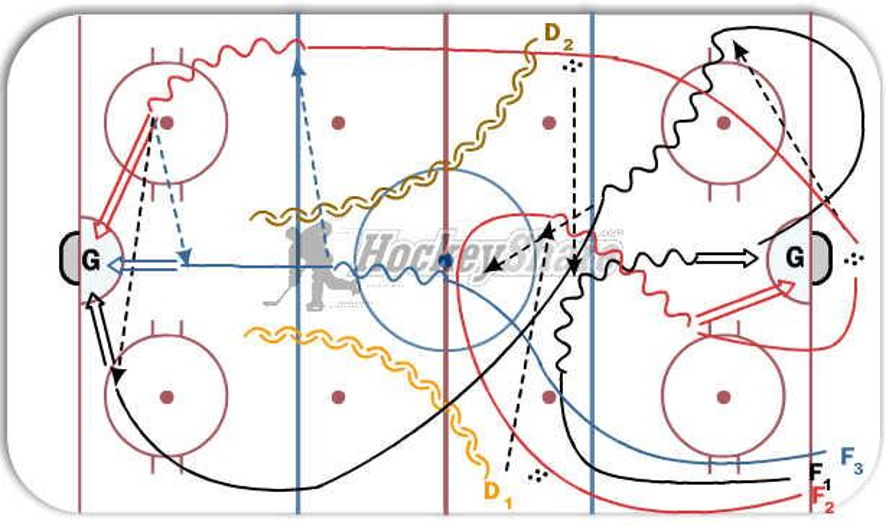
Description
F1 and F2 leave at the same time. F1 crosses the blue line and cuts hard getting a pass from D2 then goes in for a shot on net
F1 peals off to breakout position
F2 Goes high in the neutral zone and touches the red line with skate and opens up for a pass from D1 and goes in for a shot on net.
F1 goes behind the net retrieves a puck and passes to F1 to begin break out
F3 starts when F2 picks up the puck and goes up the wall and cuts into the middle for a pass from F1, F3 follows their pass and goes up the far wall and F1 continues following their pass and ends up near side creating a 3 on 2 with D1 and D2
F3 uses F1 or F2 for a pass into the zone and F1 or F2 Pass or shoot on net
Everyone goes to the net and plays until goal is scored, Puck is covered or coach blows whistle.
Notes: Done at speed watch timing and onsides. Puck carrier has to have head up in neutral zone looking for the pass to forwards with speed.
 |