D-man Involvement
This drill was created using HockeyShare.com's Online Drill Drawing & Practice Planning Platform.
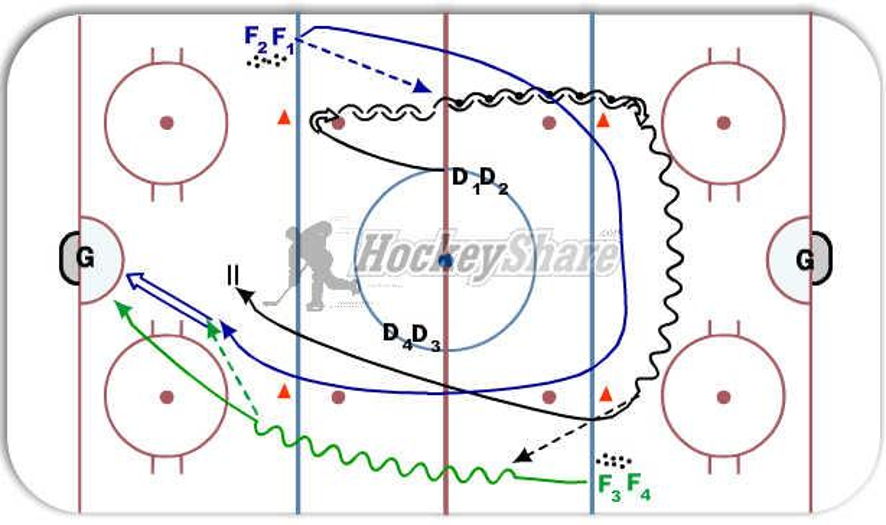
Description
1) D1 skates to Cone and pivots backwards, Takes pass from F1 and skates backwards (w/ puck) to other cone, opens up and skates forward toward other cone.
2) After pass to D1, F1 skates hard inside first and second cone and comes back up ice w/ D1 and F3.
3) F3 skates forward and takes pass from D1. F3 skates forward w/ puck and makes pass to F1 at/inside blue line and then drives hard to net for rebound
4) F1 takes pass from F3 and takes a quick shot on goal - F3 is charging hard for rebound.
Notes: Options:
1) D1 can pass to F1 or F3 at cone in Defensive zone.
2) F1 can pass back to F3 or D1 in attacking zone.
DRILL CONTINUES OTHER DIRECTION WITH D3.
 |