Neutral Zone 1 - 2 - 2

Description
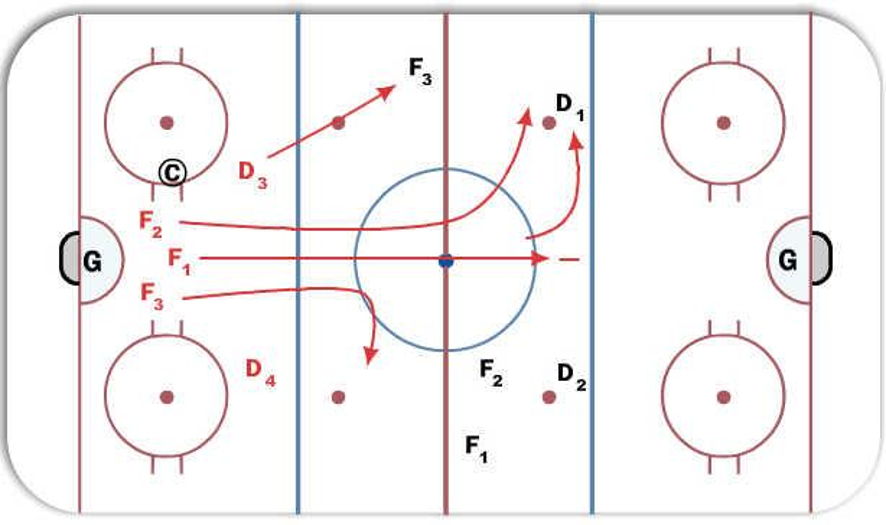
Drill is a normal 3 - 2 regroup to start.
Coach at centre of crease holds F1 F2 F3 back until time is good.
F1 then presses right up the middle hard to attempt to take away D - D pass.
Diagram 1: Not success and D - D works. Then F3 takes and angle and steps up to strong side puck and tries to seal them to the boards F1 pursues the puck taking away drop passes and supports F1.
Diagram 2: F1 is success and D has no D - D pass to make. Then F2 cuts off and pursues D1 and tries to angle him out with support of F1 before the red line forcing a dump in.
If forecheckers turn over the puck they go shoot 3 - 2.
If regroupers win the battle they either dump in and start a 2 - 1 - 2 press or 3 - 2 drive.
All players continue in the drill with back check etc.
 |