Basic Cycle 1
This drill was created using HockeyShare.com's Online Drill Drawing & Practice Planning Platform.
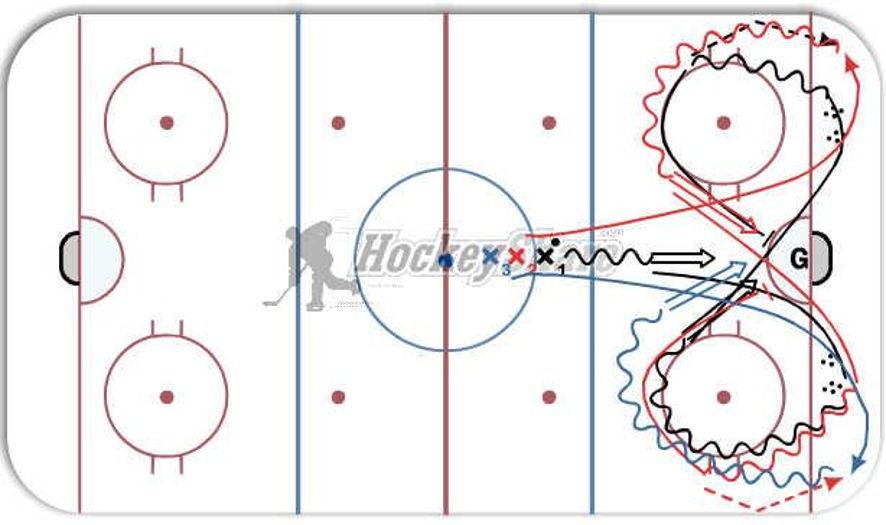
Description
X1 (Black) skates into goal and take a shot, peels off into the corner and picks a new puck up, skates to the hash marks and drops the puck off the boards (into the corner) for X2. X1 then skates hard to the net to set a screen.
X2 (Red) follows X1's path and receives a drop pass off the boards, skates around the top of the circle and shoots. X2 then skate to the other corner, picks a new puck up and skates to the hash marks and drops the puck off the boards (into the corner) for X3. X2 then skates hard to the net to set a screen.
X3 (Blue) follows X1's path and receives a drop pass off the boards, skates around the top of the circle and shoots. X3 then skate to the other corner, picks a new puck up and the drill continues.
 |