This drill is currently in the trash and scheduled to be deleted soon
Individual Coverage
This drill was created using HockeyShare.com's Online Drill Drawing & Practice Planning Platform.
Description
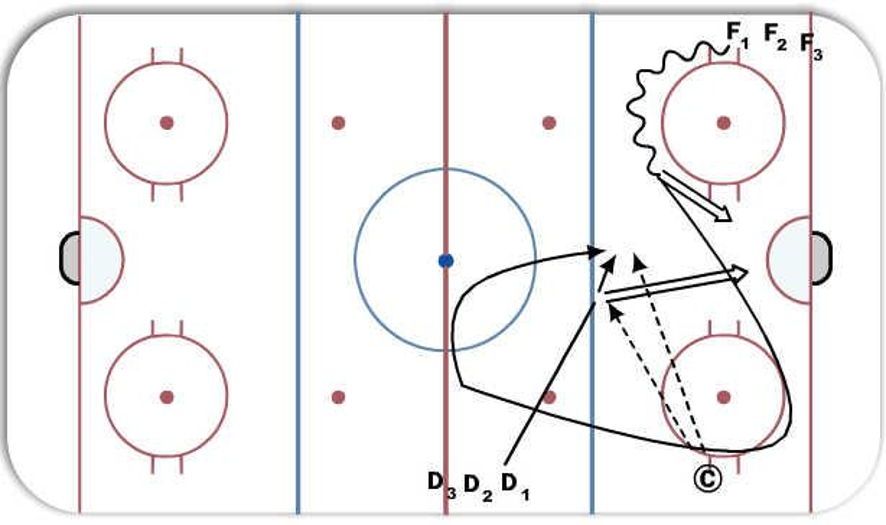
- F1 carries puck around top of FO circle, shoots, then skates below the far FO circle, out around the closest NZ FO dot and back towards the net for a pass back from Coach
- After F1 shoots and begins skating, D1 steps out for a one-time pass and shot from the BL from Coach
- After the shot from BL, D1 picks up the circling F1 and tries to cover him to the net while F1 is trying to get open for a new pass from Coach
Category: Strategy
Tags: - Defensive positioning (body and stick), - Playing the body
Posted By: Hock3599
(Used in 1 Plan)
Created: 2012-09-03, Last Modified 2013-06-03
 |