Entries Zone
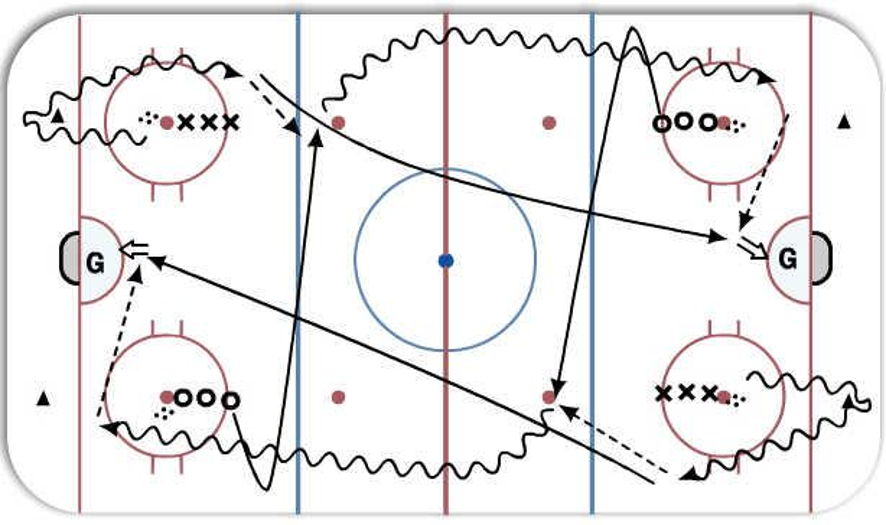
Description
1: Middle Drive
1) F1 and F2 leave on whistle.
2) F1 takes puck around the cone and up the boards
while F2 cuts hash marks and sprints over to support.
3) F2 receives pass and drives wide while F1 goes to the
middle driving mid lane directly to far post.
4) Keep feet driving through hash marks / Drive to par
post / F2 go to the net after the pass
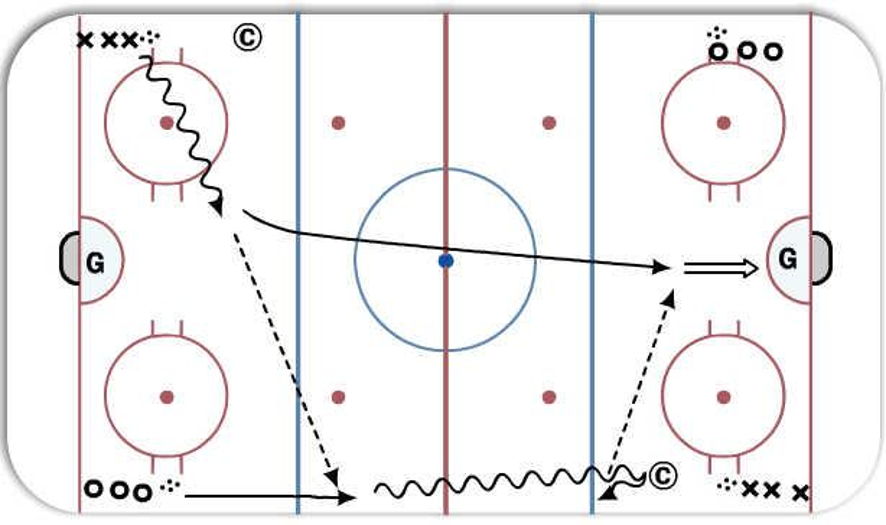
2: Delay
1) Same drill as above
2) F1 saves his ice in neutral zone to ensure he is an
option.
3) F2 looks for F1, then fills in as a high man.
Key Teaching Points
1) F2 drives deep and off the boards to create space.
2) Protect puck on the delay.
3) F1 save ice for timing purposes.
4) F2 fill in as high man.
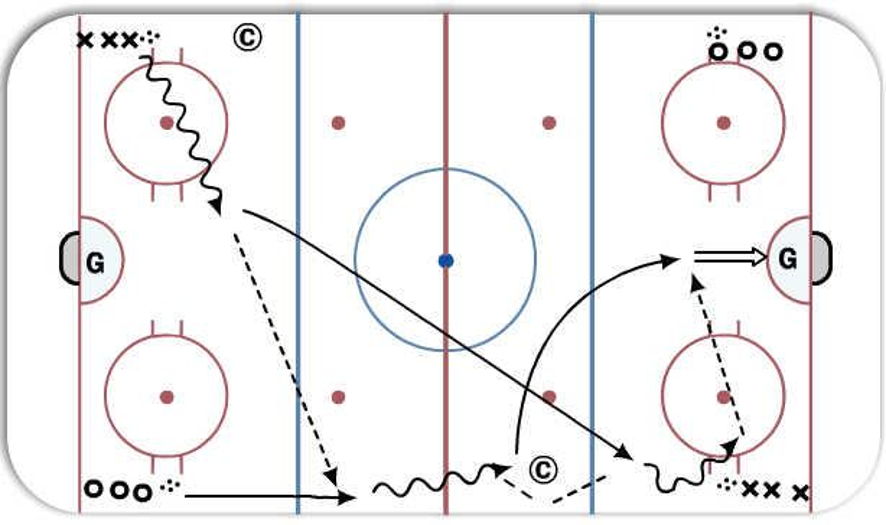
3: Chip
1) F1 and F2 leave on whistle.
2) F1 takes puck and feeds F2 going up the boards then
skates to support.
3) F2 draws coach to him and chips puck to open space
for F1 to skate into it.
4) F2 rejoins F1 on the rush.
5) Both ends same time.
Key Teaching Points
 F1workstosupport.
 F2waitsforcoachtocommitthenmovespucktoopen
space.
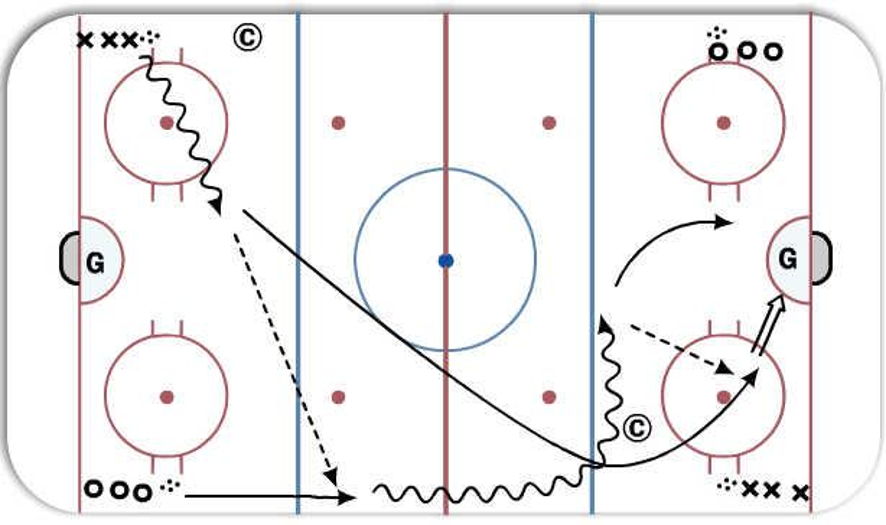
4:Cross
1) Same as above, except F1 and F2 execute an offensive cross at the blue line.
2) Can be a drop pass for F1 with drive or F2 can keep and drive or keep and feed to F1.
Key Teaching Points
 Play without puck support from behind on cross.  There must be a net drive after the cross.
 |