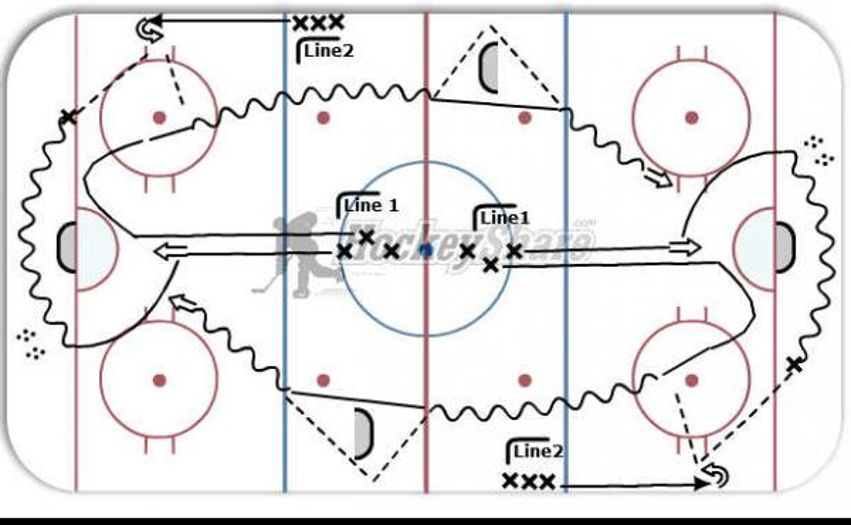
Break Out Drill

This drill was created using HockeyShare.com's Online Drill Drawing & Practice Planning Platform.
Description
-Player leaves line 1 and takes a shot. He then skates into the corner, picks up a puck and goes behind the net.
-Player leaves line 2, when he see the first player picking up a puck in the corner, and skate in to the hash marks.
-A 2nd player from line 1 skates in towards the net and curls down low when he sees that the first player is behind the net.
-Player(1) makes a pass to player(2). Player(2) then makes a pass to player(3).
-Player(3) then skates down the ice, shoots at the net, goes to the net for rebound and the drill continues.
-Player(2) goes to Line1 and the shooter goes to line2.
Notes: Could turn it into 1 on 1's or 2 on 1's.
Could bank the puck of boards on the break out.
Make the pass to the center on the break out and make it a give and go.
