Billy Keane Breakout high tip 2 - 1 Backchecker
Description
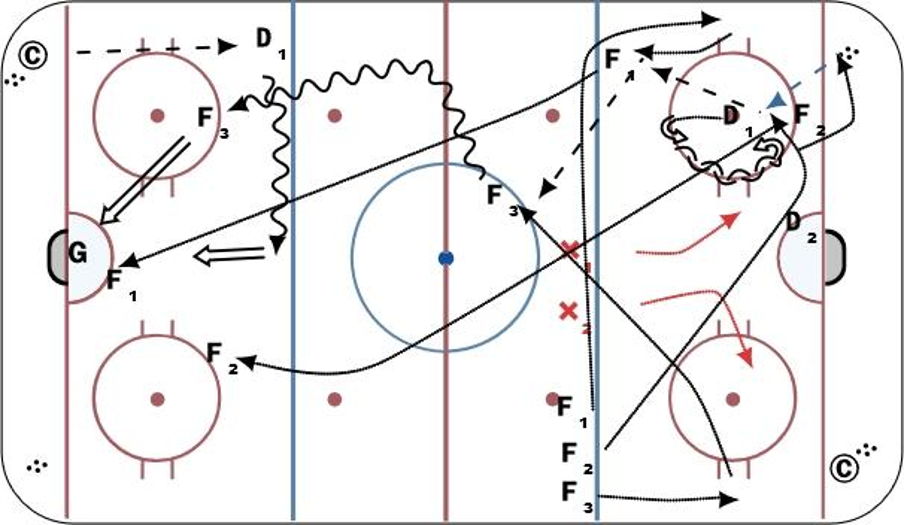
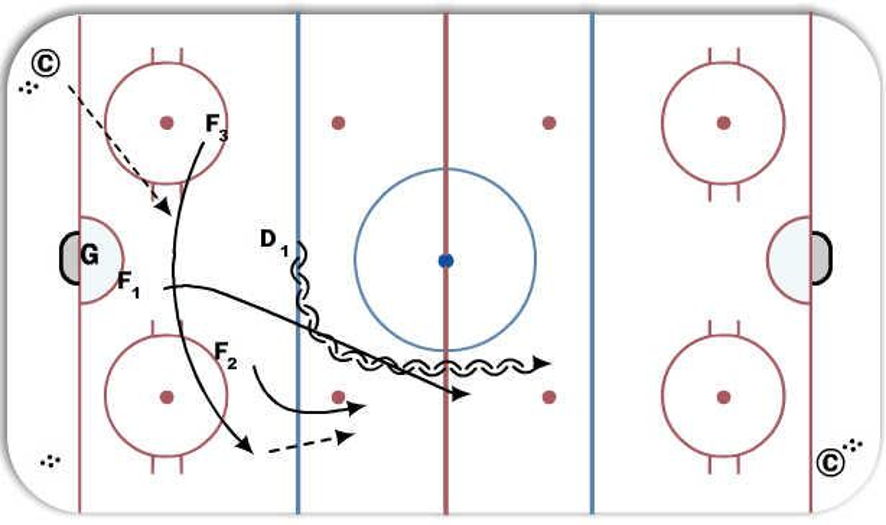
Part 1: F1 F2 F3 Line up on blue line D1 on dot. Coaches in both corners pucks in both corners
D1 leaves on whistle as shown and retrieves a puck.
F1 = top down breakout man
F2: Low and slow supporting man (first breakout pass option)
F3: Far side wall
D1 passes to F2 and F2 hits F1 quick
F3 cuts up the middle and gets fast break pass from F1 and drives wide.
F1 becomes "support" man and follows F3 then drives the midlane at blueline.
F2 is now high guy who comes in far dot and stays high.
D1 follows play up to blue line.
3 - 0 makes a choice and scores (do not stop until puck goes in or is frozen). Coach then passes to D1 who walks the line and shoots.
F1 is low tip F3 is high tip and F2 is back door.
Coach then blows the whistle and F3 and F2 breakout of zone (5 quick strides) and get pass.
F1 backchecks (tracks) and F3 F2 play 2 - 1 vs D with backchecker.
Notes: Key points
F1: Win the wall, puck support, Drive Net
F2: Low and Slow, Breakout, High Dot Drive
F3: Fast Break, Choose tactic on drive before the circle (Score, POP, Pass)
D1: Shoot with purpose, stay in the middle wait for help, quick breakout pass to F2.
Backchecker (5 quick strides right away, transition quick)
 |