D-Zone exchange
This drill was created using HockeyShare.com's Online Drill Drawing & Practice Planning Platform.
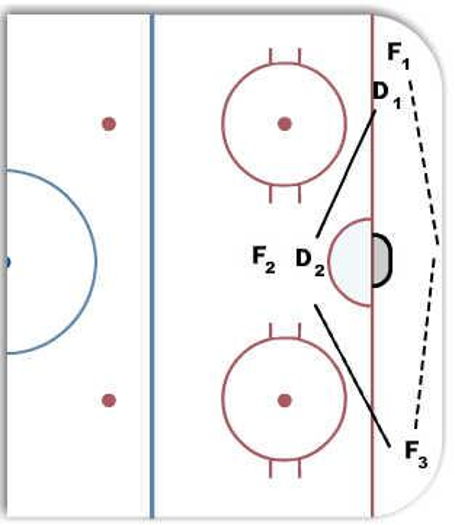
Description
Start the drill with a forward in each corner. F1 starts with the puck and is protecting it from D1. F2 is in front of the net and F3 is in the opposite corner without a puck. On the whistle F1 & D1 play a 1 on 1 in the corner until the whistle. On the whistle F1 has to pass the puck to F2 in the other corner. D1 then has to sprint back to the front of the net to cover F2. D2 cannot leave F2 open so they have to wait until they are relieved by D1. Once D1 returns to the front of the net then D2 plays F3 1 on 1 out of the other corner. If at any time F2 is left open in front then they can receive a pass from one of the other forwards. The play continues back and forth until the defense create a turnover, the goalie freezes the puck, or a goal is scored.
 |