This drill is currently in the trash and scheduled to be deleted soon
JT D-Pressure
This drill was created using HockeyShare.com's Online Drill Drawing & Practice Planning Platform.
Description
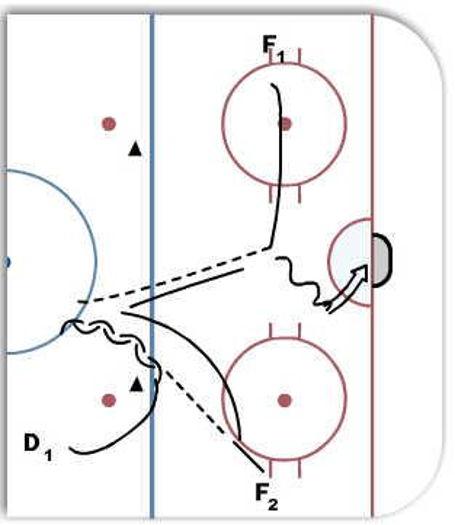
D1 skates to the cone and pivots backwards. F2 takes two steps towards D1. Passes him the puck and then pressures the D to make a quick decision with the puck. Meanwhile, F1 is cutting across getting open for the pass from d1. After the pass is made, F2 becomes a back checker.
Category: Defense
Posted By: tony leccesi
(Used in 2 Plans)
Created: 2017-01-17, Last Modified 2017-01-17
 |