This drill is currently in the trash and scheduled to be deleted soon
Coma 2 vs 1
This drill was created using HockeyShare.com's Online Drill Drawing & Practice Planning Platform.
Description
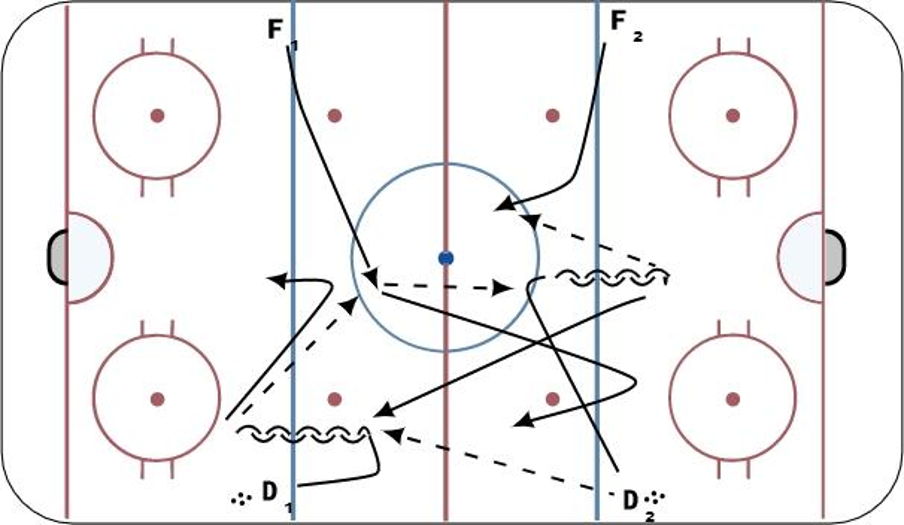
D1 get up ice and pivot. D2 make pass to D1 who pulls puck backwards. D2 gap up ice. F1 cut across ice and receive pass from D1. F1 pass to D2 who pivots backwards and pulls puck back. F2 then supports puck on far side. F2 slash across gets to middle. D2 can pass to either forward who go down on 2 vs 1 against D1.
D2 gets forward and skates toward D1 to start drill.
Category: 2 on 1
Tags: D pulling puck back., Forward coming to puck and support, Quick transition attack.
Posted By: cazzano@*********
(Used in 13 Plans)
Created: 2017-10-12, Last Modified 2017-10-12
 |