Tigers Shooting Drill
Description
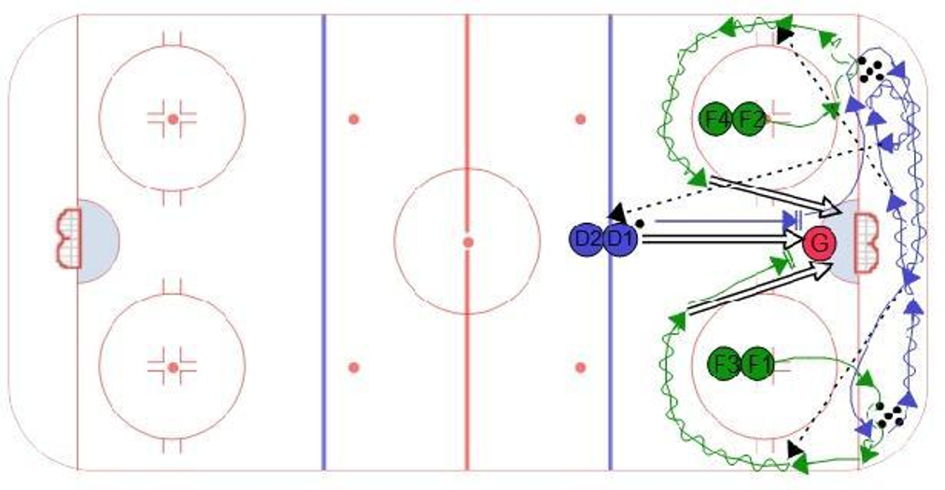
The drill starts with D1 taking a shot from the point and following it to the net for a rebound. After they stop at the net they continue to the corner to get a puck and carry the puck back around the net. While they are picking up the puck F1 curls towards the boards and gets in position to receive a breakout pass from D1. Once they receive the pass they curl into the slot behind the line of fowards and take a shot on net. F1 follows their shot for a rebound and then returns to the end of the line. D1 continues the drill by picking up another puck from the other corner and carrying it around the net to make another outlet pass to F2. F2 does the same thing as F1 on the other side. After D1 makes the second pass they continue to the corner one more time to retrieve a third puck. This time they make a pass out to the blue line to the next defense who starts the drill over again.
 |