This drill is currently in the trash and scheduled to be deleted soon
Saucer pass - Give and GO
This drill was created using HockeyShare.com's Online Drill Drawing & Practice Planning Platform.
Description
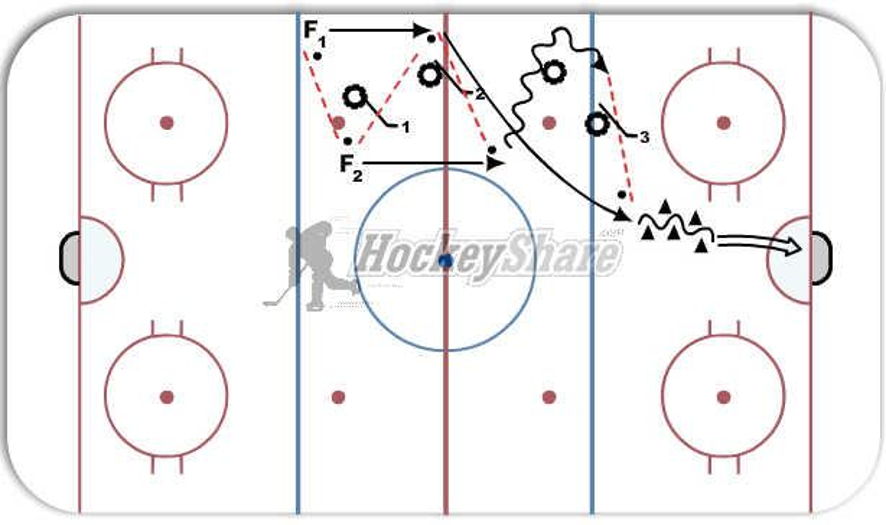
- F1 starts with the puck and passes to F2
- F2 saucer passes back to F1
- F1 accepts pass after skating forward and then saucer passes back to F2
- F2 and F1 cross paths while F2 stickhandles around tire
- F1 crosses blue line once F2 has crossed and then accepts saucer pass from F2
- F1 then stickhandles around pylons and then takes a shot on net
Notes: - Sticks are laid down on the tires
Category: Passing
Tags: -work on 'give and go' via saucer passing
Posted By: tmlfan4life
(Used in 0 Plans)
Created: 2012-11-20, Last Modified 2013-06-03
 |