This drill is currently in the trash and scheduled to be deleted soon
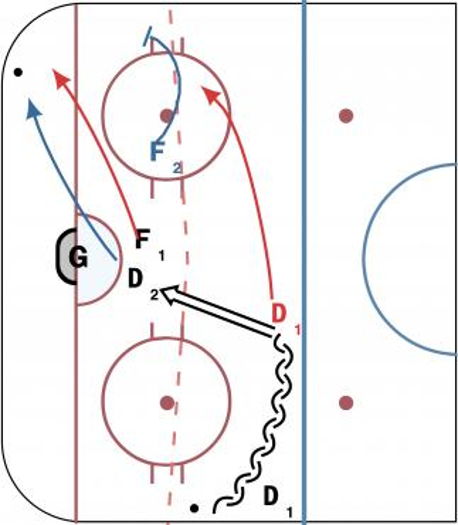
D defend shot & clear zone
This drill was created using HockeyShare.com's Online Drill Drawing & Practice Planning Platform.
Description
1) D1 back pedals and shoots from point QUICKLY
2) D2 & F1 play shot in front of net (D defends goal mouth) PLAY REBOUND IN CLOSE
3) After shot, D2 & F1 play 2nd puck in corner (BLUE/RED). D gives outlet to F2 (BLUE), D1 (RED) supports F1.
PLAY IS DEAD ON a) goal b)outlet pass . d)puck past hash marks (RED DASHED LINE
Category: Defense
Posted By: philyarger
(Used in 0 Plans)
Created: 2018-09-03, Last Modified 2018-09-03
 |