This drill is currently in the trash and scheduled to be deleted soon
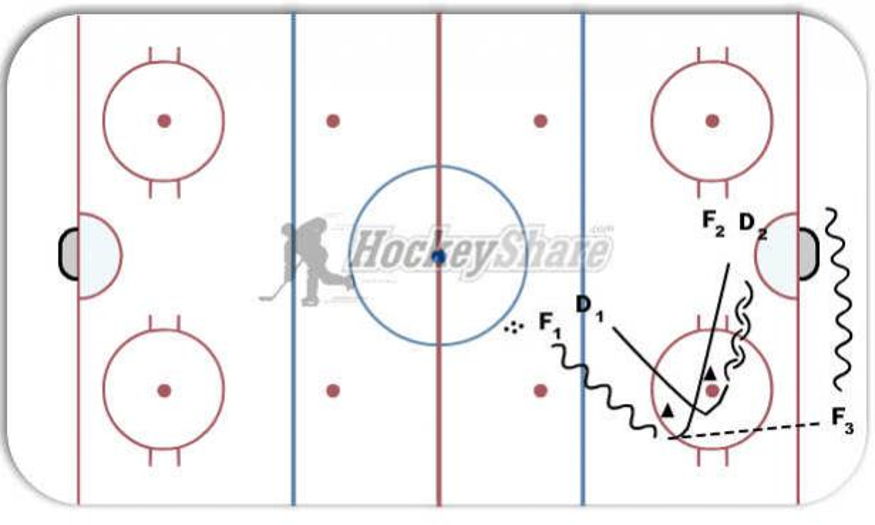
3 on 2 control from behind the net
This drill was created using HockeyShare.com's Online Drill Drawing & Practice Planning Platform.
Description
F2 and D2 set infront of net
F3 position in corner
F1 carries puck - D1 tracks him
F1 passes puck to F3 a cone and crashes net
D1 tracks him in
F3 carries puck behind net as 2 F and 2 D work to get clear
F3 doesnt cross goal line -- moves for open pass
Category: Passing
Tags: Control puck behind net
Posted By: andrew.roselli
(Used in 3 Plans)
Created: 2011-09-09, Last Modified 2013-06-03
 |