This drill is currently in the trash and scheduled to be deleted soon
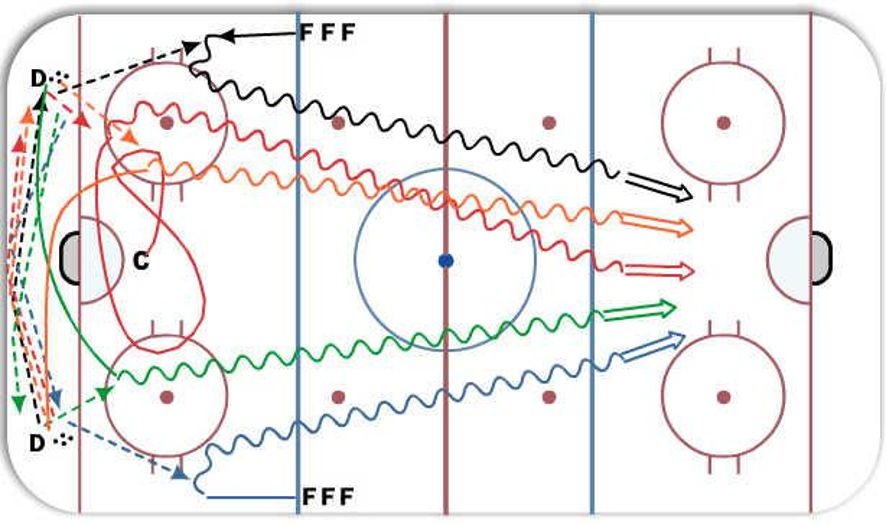
Breakout Progression
Description
S1: Top down Breakout:D to D to W, D to D to W, D to D to C, D to D to D, D to D to D, D to D to W, ...etc.
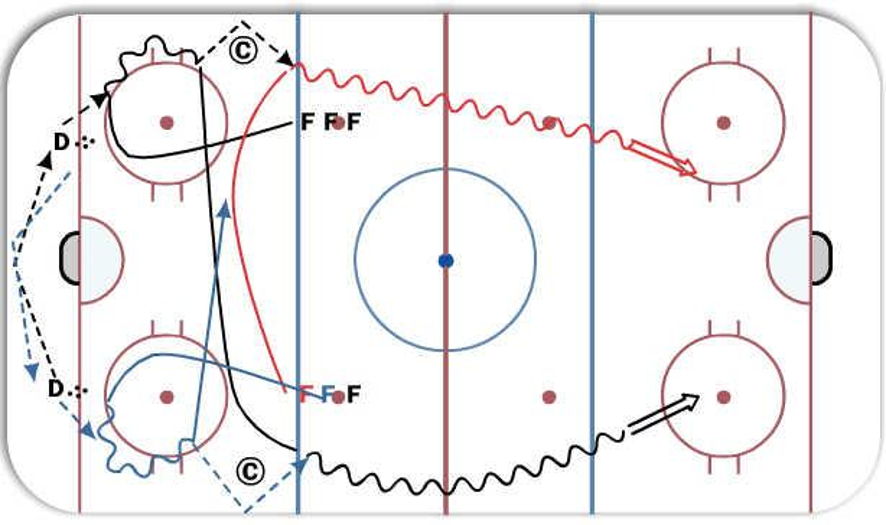
S2: GLR Breakout:D to D to F1-F1 off broads to F2, D to D to F3 off boards to F1,...etc.
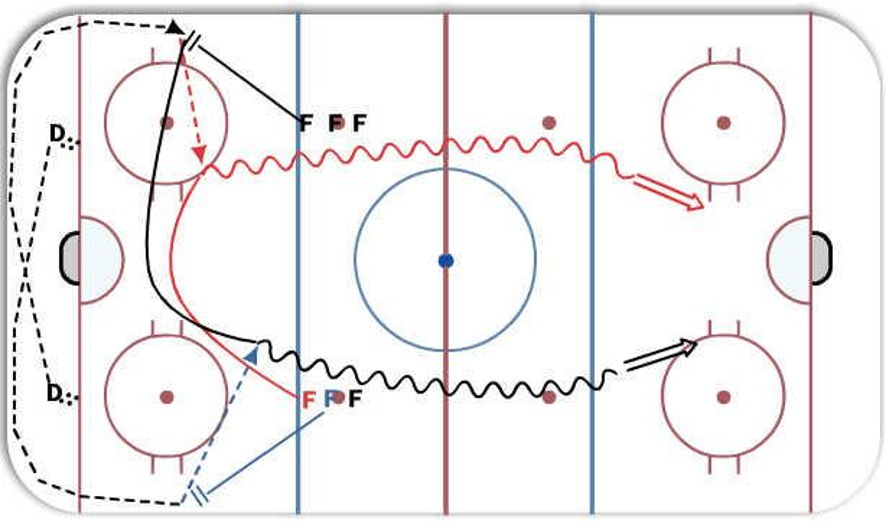
S3: Wrap Breakout:D wrap to F1, F1 to F2. D wrap to F3, F3 to F1,...etc.
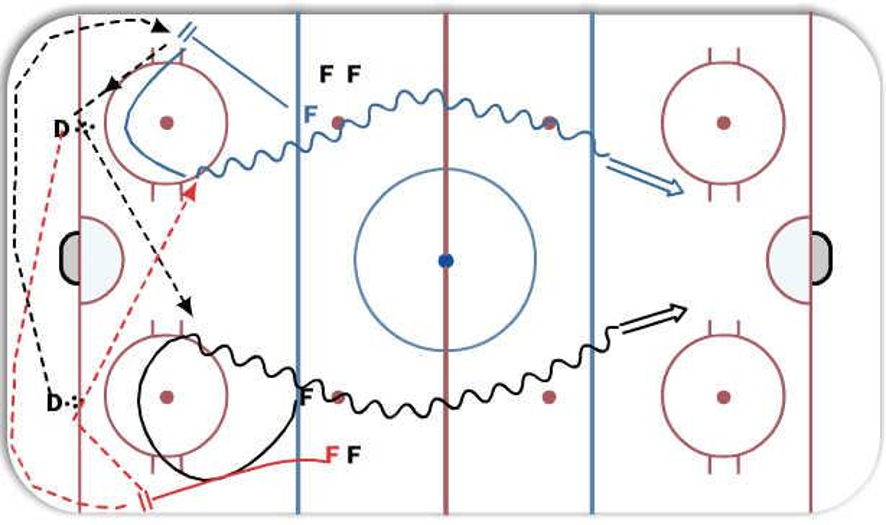
S4: Countertrap break: D1 wrap to F1, F1 to D2 to F2. D2 wrap to F3, F3 to D1 to F1,...etc.
Category: Systems
Posted By: Keeepaa
(Used in 0 Plans)
Created: 2012-12-16, Last Modified 2013-06-03
 |