Defensive Zone 2 0n 3 Down Low w/ B/O to 2 on 1
This drill was created using HockeyShare.com's Online Drill Drawing & Practice Planning Platform.
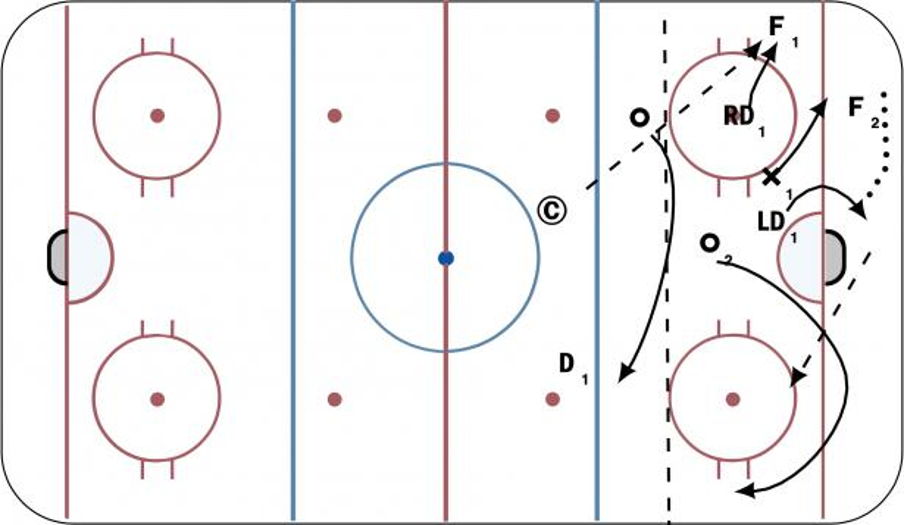
Description
D1 starts in front of net with the support of X (use a forward)
F1 and F2 start in the corner, Protect Puck and try to score (stay below top circle)
Coach passes a puck to F1, F1 trys to cycle with F2 to generate a scoring chance,
D1 closes on F1 and either trys to pin or knock puck off his stick. X supports and may have to check and pin F2
D2 Protects the net front.
X1 and D1 bump the puck to D2 behind the net and D2 passes to O1
O1 and O2 attack 2 vs 1 the other way
Continue to battle until coach blows whistle
Notes: After F1 moves the puck it is importamt that D1 Rides F1 and comes back to D side to support X.
D2 Plays of near post in a good defensive position. And is ready to pick up a bump pass.
 |