This drill is currently in the trash and scheduled to be deleted soon
5 on 2 D2 D passing cover back
This drill was created using HockeyShare.com's Online Drill Drawing & Practice Planning Platform.
Description
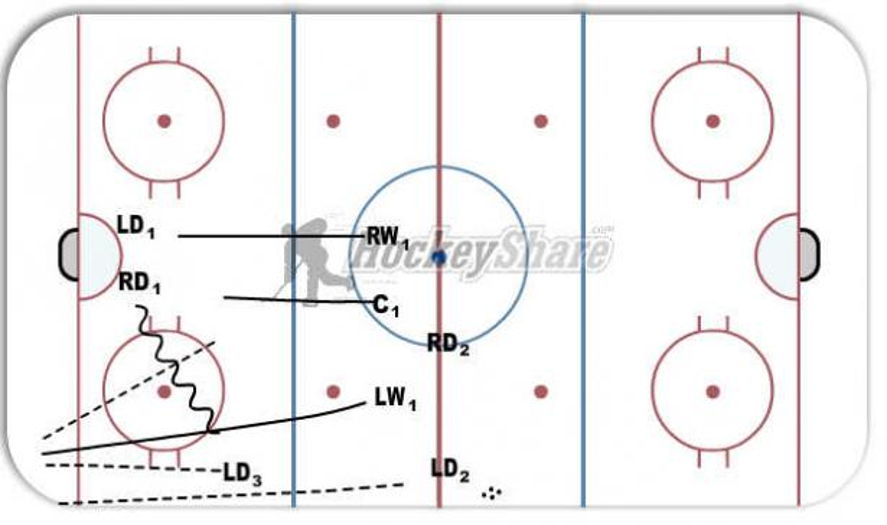
5 on 2 - 3F and 2D on forecheck line up at red line - 2 D line up in zone to defend net
Starts - 3F attack the zone - LD dumps puck into zone (ensure on-sides play)
LW goes to puck - C & RW position in front of net D holds blue line
LW passes to LD and LD crashes net - LW covers D until his return
C and RW cover rebounds
Swap to other side to allow both wings and both D to understand
Category: Competitive
Tags: cover back for D, D2D passing, working the Ozone, Timing puck dump
Posted By: andrew.roselli
(Used in 1 Plan)
Created: 2011-09-14, Last Modified 2013-06-03
 |