1 on 1 to Dzone breakout
This drill was created using HockeyShare.com's Online Drill Drawing & Practice Planning Platform.
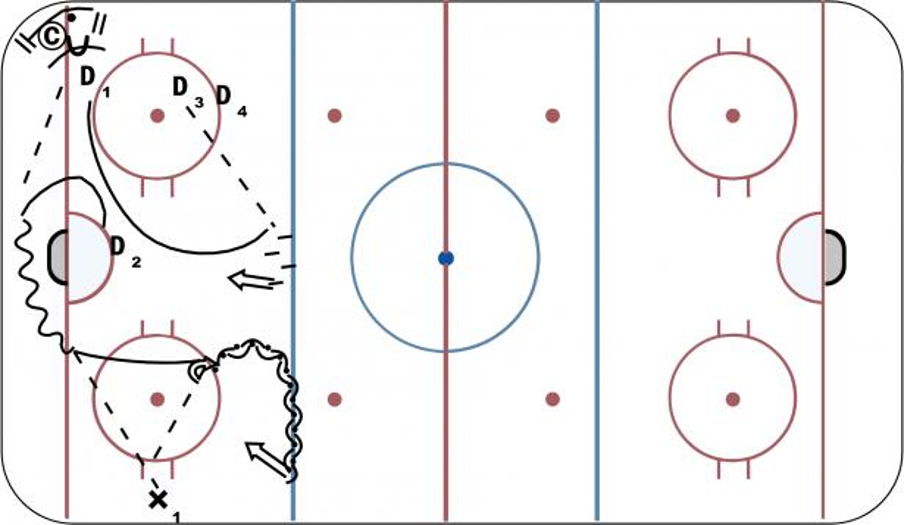
Description
Drill starts with (C) on boards with the puck. (Can be a player as well - make sure the player knows this drill is meant for the D to battle). (C) can move up and down the boards while D1 is engaging and trying to hit/pin and separate the man from the puck. D2 is in front of the net, watching the battle ready to react to D1 winning the battle. Once D1 gets the puck they will 'bump' it behind the net to D2. D2 wheels around the net to find X (winger) on the boards for an outlet pass. D1 meanwhile will come back to the front of the net and wait for the breakout to happen. D2 continues up ice to get pass from X, then pivots at the blue line to open up and takes a shot on net. D1 after watching D2 make outlet pass and get up ice in front of D1 will then leave the front of the net and sprint up to the blue line, turn and receive a pass from D3. D1 creates a shooting lane and fires the puck.
D1 becomes D2 after. D2 becomes X. X joins back of the D line.
 |