This drill is currently in the trash and scheduled to be deleted soon
Breakout 1 on 1, High Shot
This drill was created using HockeyShare.com's Online Drill Drawing & Practice Planning Platform.
Description
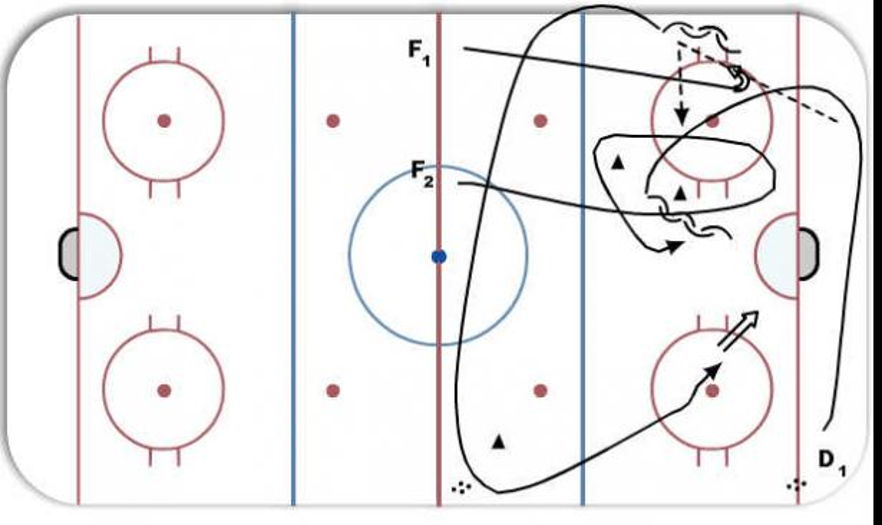
F1 and F2 move to regular breakout positions. D1 skates behind the net and makes a breakout pass to F1. F1 passes to F2. F2 curls around the high cone, D1 curls around the low cone - play a 1 on 1 rush. F1 curls out of the zone around the far cone and picks up a new puck. F1 shoots as F2 and D1 battle for position in front of the net while F2 shoots/crashes the net.
Category: Competitive
Tags: Breakout Passes, 1 on 1, Net Front Battle
Posted By: HockeyShare Drills
(Used in 132 Plans)
Created: 1969-12-31, Last Modified 2021-11-27
 |