This drill is currently in the trash and scheduled to be deleted soon
Transition Options

This drill was created using HockeyShare.com's Online Drill Drawing & Practice Planning Platform.
Description
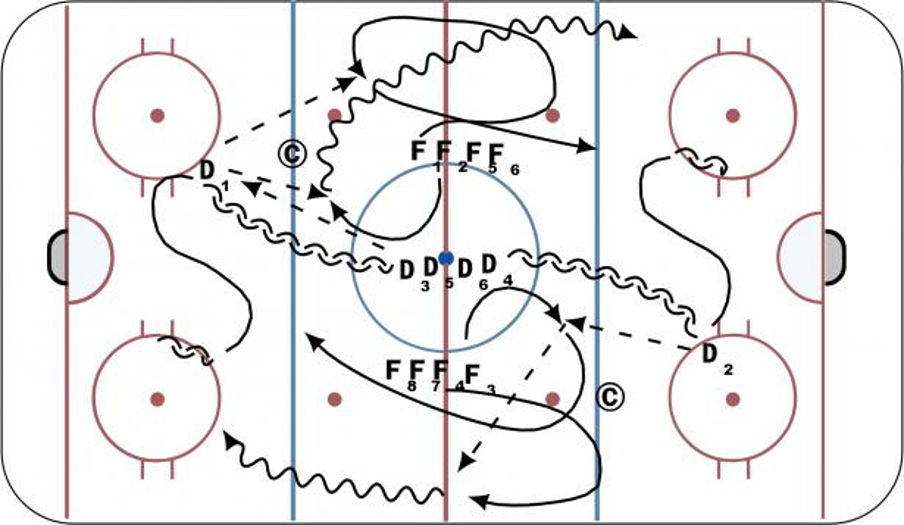
- First D releases and gets pass from next D in line.
- F1 releases and stretches as far as possible staying on side.
- F2 supports low in the middle.
- Depending on coaches position D passes to F1 or F2
Category: 2 on 1
Tags: D stay off the wall give yourself an angle for indirect pass, F1 stay about stick length off the boards to protect puck, F2 save ice for support through middle, F2 go with speed on stretch pass.
Posted By: DarrenG
(Used in 0 Plans)
Created: 2020-03-24, Last Modified 2020-03-24
