This drill is currently in the trash and scheduled to be deleted soon
Justin's Neutral Zone Regroup and Attack 2 on 2
This drill was created using HockeyShare.com's Online Drill Drawing & Practice Planning Platform.
Description
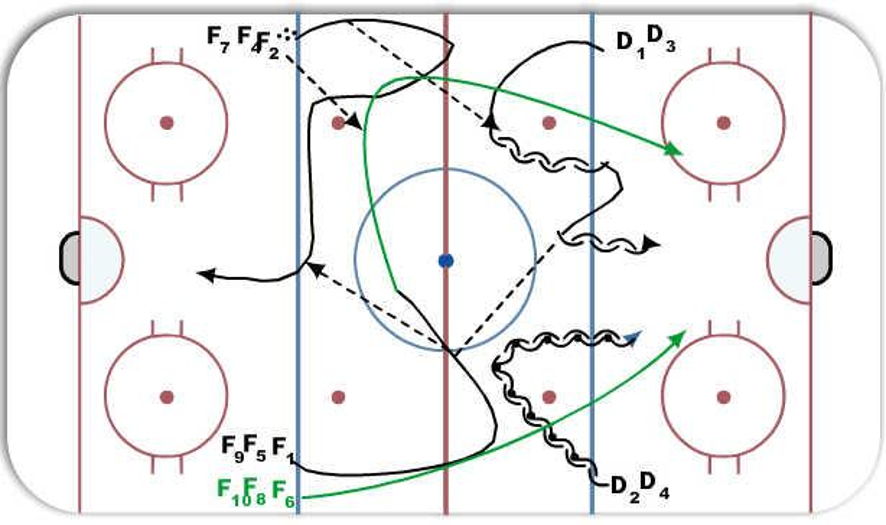
A D steps out, pivots, and receives a pass from the F. The D backpeddles with the puck and pivots to forwards. The D makes a pass to the second F who supports the puck.Headman pass to F on the blueline. Shoot on Goal. After F1 has made the pass to F2 he will skate across the ice and receive a pass from F4 (next in line after F2) and go wide and go down the ice for a 2 on 2 with F6(in green). F6 will go into the F1 line, F1 will go into the F2 line and F2 will go into the F6 line. Return to your line up the boards.
Category: Timing
Tags: Timing, Goog Passes
Posted By: krasmuss34
(Used in 1 Plan)
Created: 2013-08-09, Last Modified 2013-08-09
 |