Net Presence 1 on 1
This drill was created using HockeyShare.com's Online Drill Drawing & Practice Planning Platform.
Description
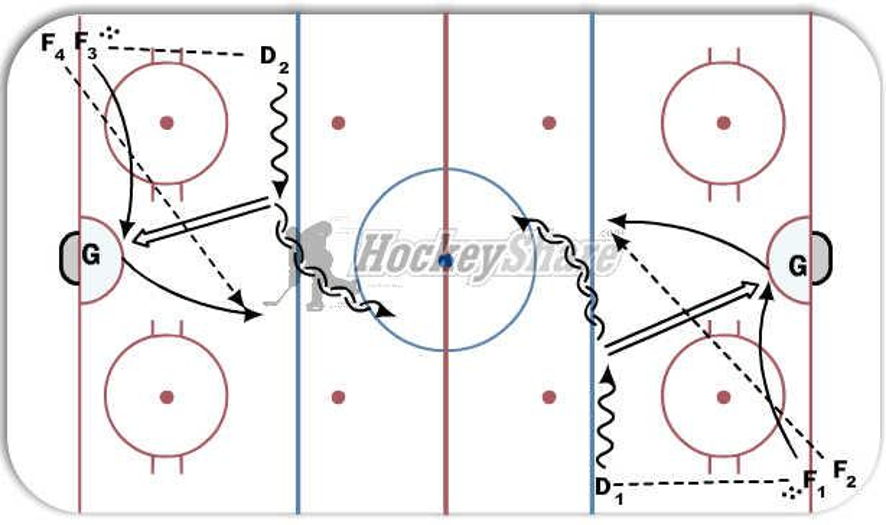
This drill runs on the whistle from both ends at the same time. Ds should all be in centre circle waiting for their turn. F1 passes D1 a puck and heads to the front of the net.
D1 walks the blueline and shoots low as they approach the middle of the ice. F1, with good positioning in front of goalie, looks for a re-direct. After the shot, F1 breaks towards the middle and receives a pass from F2. D1 reads the play and maintains good gap control as they play F1 on a 1 on 1. Same thing coming from the other side
Notes: F1 MUST take puck wide through the neutral zone on the 1 on 1 so that there aren't any collisions with the drill coming the other way.
 |