Net Presence 2 on 1
This drill was created using HockeyShare.com's Online Drill Drawing & Practice Planning Platform.
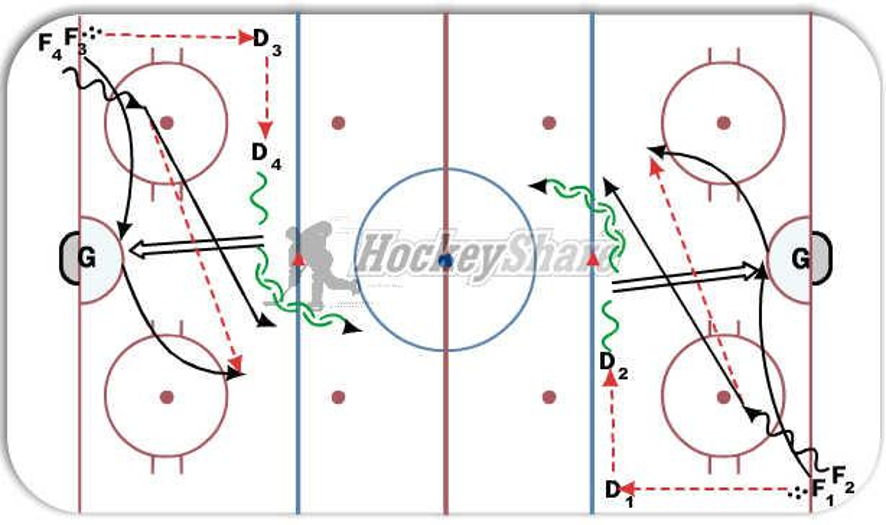
Description
This drill runs on the whistle from both ends at the same time. Use as a progression from Net Presence 1 on 1. F1 passes to D1 and goes to the net. D2D pass from D1 to D2 who moves toward the middle at shoots low. F1, with good body positioning in front of goalie, looks for a re-direct. As D2 shoots F2 starts skating towards middle of the ice. After the shot F1 starts to leave the zone and gets a pass from F2. F2 skates hard to join the rush, D2 plays F1 and F2 on a 2 on 1. D1 become D2 and a new D acts as D1. The same thing happens from the other end at the same time.
Notes: Be sure the drill from BOTH ways goes around the cone at the centre of each blueline to avoid collisions in the middle.
 |