Net Presence 3 on 2
This drill was created using HockeyShare.com's Online Drill Drawing & Practice Planning Platform.
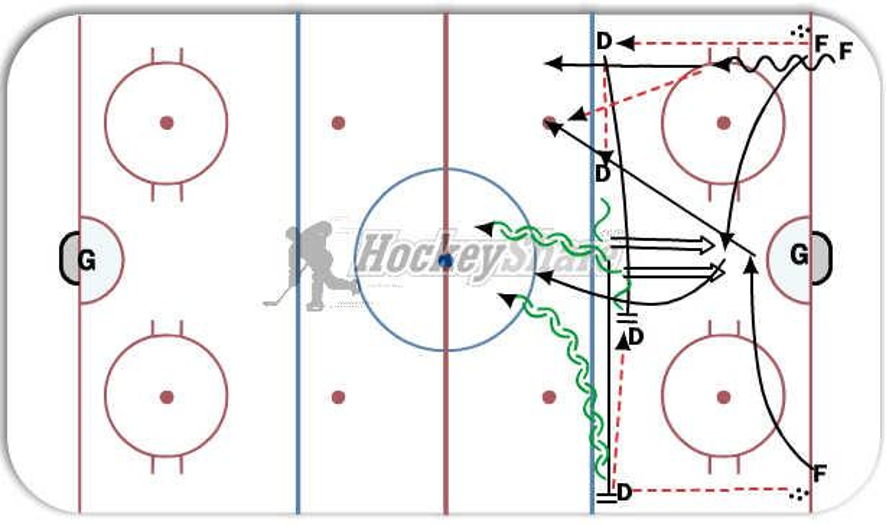
Description
Use this as a progression from Net Presence 1 on 1 and Net Presence 2 on 1. This is a full ice drill. Goes one way for all players, then back from the other side. F1 passes to D1, who makes a D2D pass to D2. F1 goes to the net for a re-direct, and stays there. D2 shoots low and stakes to far boards to receive a pass from F2, while D1 moves towards the middle at the point. D2 makes a D2D pass to D1 as F2 goes to the net (higher (or lower) than F1) in slot. D1 shoots low, looking for a re-direct. After ONE (1) rebound chance (if there is one), F3 skates out of corner with puck, as F1 and F2 look to fill lanes on the breakout. D1 and D1 maintain good gap control and play the full ice 3 on 2. Fs should enter the zone according to plan (ex. Middle Lane Net Drive).
 |