Point Shot to 1 on 1 Battle
This drill was created using HockeyShare.com's Online Drill Drawing & Practice Planning Platform.
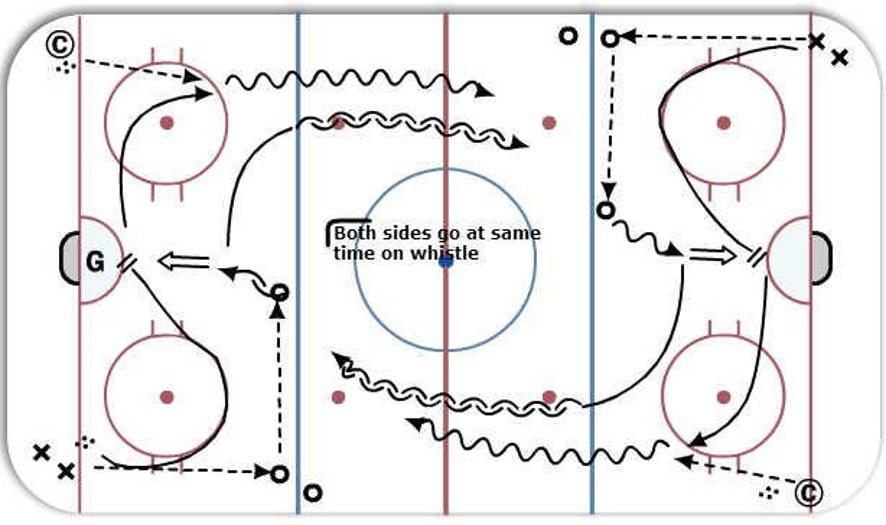
Description
Forwards line up in corner at the goal line
Defence 1 at the blue line near the boards
Defence 2 goes out closer to center on the blue line (like they would setup in the attacking zone)
Forward passes to Defence then skates hard around the circle and positions himself in front of the net for a screen and deflection
D passess to other D who then takes a couple of step in towards the net and takes a shoot. (forward attempts to deflect)
Forward then takes off out of the zone on the wing and receives a pass from the coach. The shooting defence man exists zone and picots to backwards skating and it turns into a 1 on 1 battle with the forwards taking a shot on net (if the D doesn't stop him) then they join the opposite lines.
D to Focus on D to D passing, and gap control
F to focus on passing to the point, driving the net and 1 on 1 skills.
G to work on rebound control and seeing through traffic.
Notes: Both sides of the ice go at same time (on coaches whistle)
 |