Breakout - Regroup - Regroup - Attack
This drill was created using HockeyShare.com's Online Drill Drawing & Practice Planning Platform.
Description
Breakout Regroup Regroup Attack
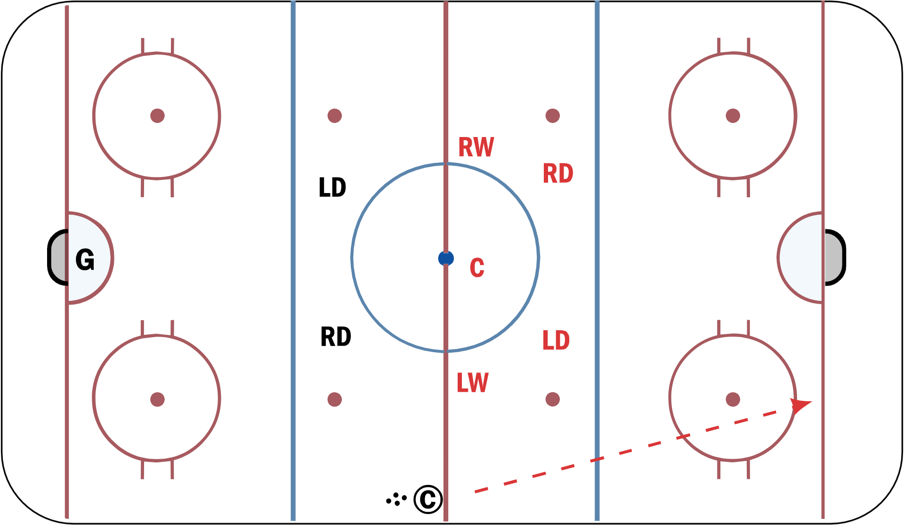
Too tough to draw so explanation will hopefully be clear.
This can be run when you have one goalie - just always dump into the end with the empty net.
One forward line and two D pairs are on the ice. Other players are waiting on the boards in their lines and d pairs.
Coach dumps a puck into the zone. Red forwards and Red D head into the zone to get it and then break out. After the red forwards cross the blue line, they pass back to the Black D to initiate a regroup. D should go D to D to try to swing the puck to the opposite side.
Forwards then pass back to the red D for another regroup. D should again go D to D to swing the puck to the opposite side.
After the 2nd regroup, the Red forwards and Red D should then attack black D using the attack triangle zone entry, 1st player (F1) wide, 2nd player (F2) drive far post, 3rd player (F3) supports puck and goes to the soft spot in the high slot. Can let the play go until puck is cleared, a goal is scored or the goalie covers the puck.
After this sequence is complete, the forwards and one set of D switch out and the coach dumps the puck in on the other end and the drill continues.
If there is only one goalie, will always dump in to one side.
If there are only 4 defense, the defense pairs switch sides and go with a new set of forwards.
Progression:
Coaches can try to disrupt the initial breakout by applying pressure and taking away options
 |