This drill is currently in the trash and scheduled to be deleted soon
5 on 2
This drill was created using HockeyShare.com's Online Drill Drawing & Practice Planning Platform.
Description
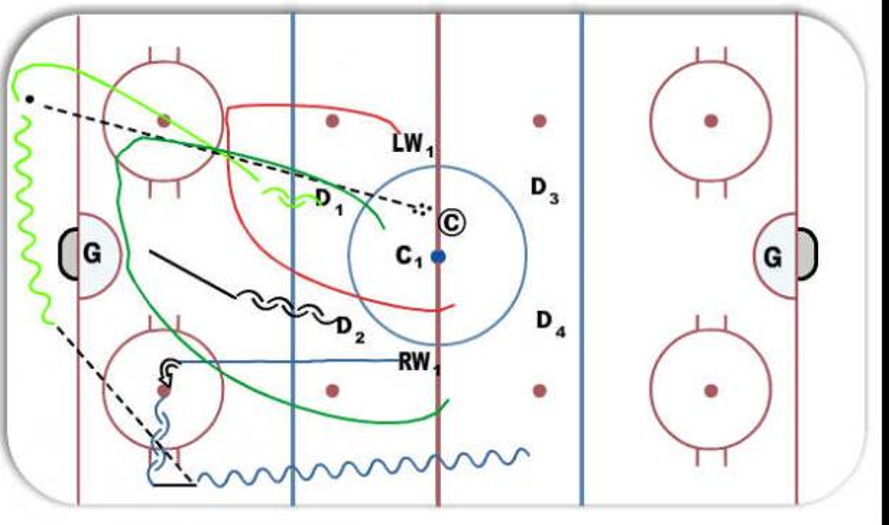
d moves puck behind net to winger who moves puck up ice and d3 and d4 defend the breakout.
Category: Systems
Tags: zone recovery to break out
Posted By: hockey-dad-of-3
(Used in 0 Plans)
Created: 2011-10-02, Last Modified 2013-06-03
 |