Basic Breakout x 2 - D to D
This drill was created using HockeyShare.com's Online Drill Drawing & Practice Planning Platform.
Description
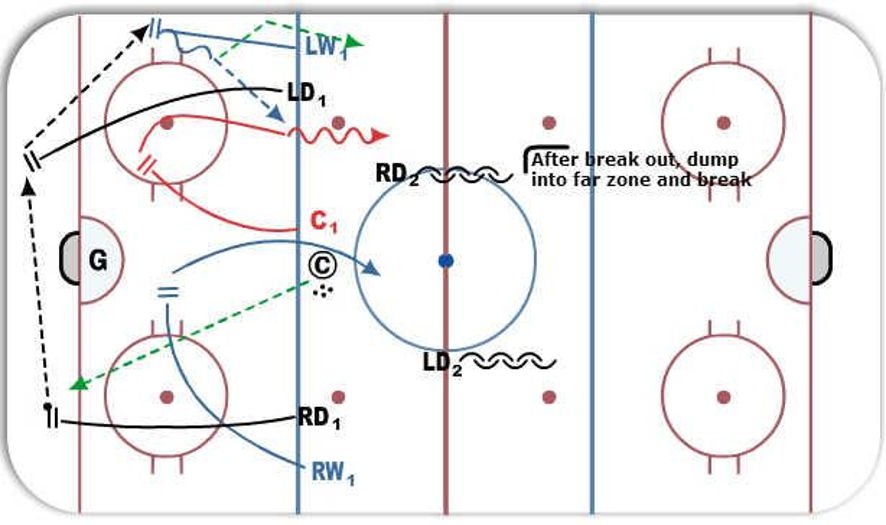
The Basic D to D breakout is used when excessive pressure is applied to the strong side from the opposing team.
The receiving D man has the option to pass to the winger on the boards or to skate up ice looking for either the Centre or winger.
- RD retrieves puck and moves towards the net
- LD skates behind the goal line in support to receive pass from RD
- LW moves down the left side and provides a target for LD to pass to
LD has options:
1) Skate puck out of zone
2) Pass to LW
If 2) then LW skates off the boards to give himself a better angle and passes to either C who has started to break out with the RW or passes off the boards for C to skate onto the puck.
- LD and RD cover the centre lane and move up with the play, dump into far end and set up for a second breakout into a 3 on 2 with the original D.
Notes: - Crisp tape to tape passes are essential.
- Feet moving throughout the swing for C and RW.
Speed is our Friend!
 |