This drill is currently in the trash and scheduled to be deleted soon
Weakside D Breakout (Support Drill #1)
This drill was created using HockeyShare.com's Online Drill Drawing & Practice Planning Platform.
Description
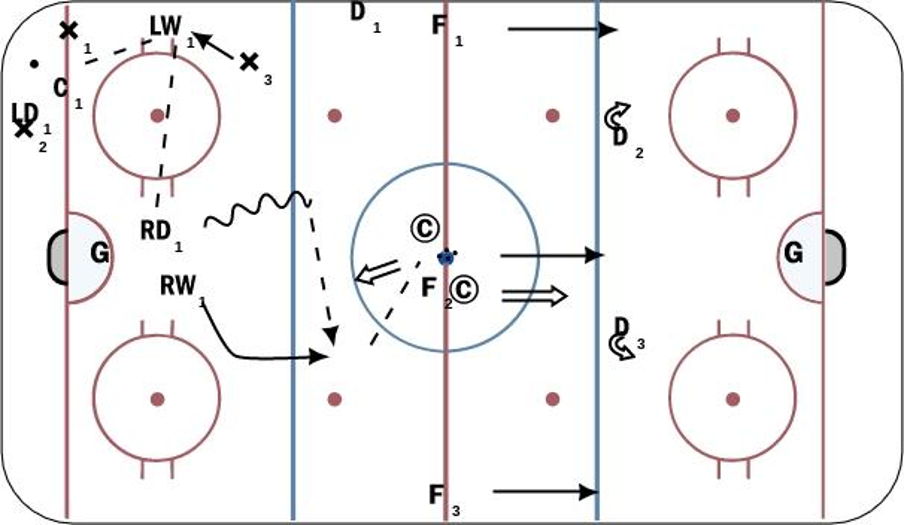
(half ice drill run out of both ends) Coach dumps puck in either on goalie or to one corner or rims it and goalie has to stop it behind the net. Second wave sent in as a passive attack to pressure strong side winger only. The play typically starts with a battle in the corner after the dump in, reason being is that we want the center to be a non-option on the breakout forcing the winger after the pass out from the battle to go wide to weakside D who engages and calls for the puck. D then quickly moves it up to the far winger and then back to the coach for a 2nd dump in and a repeat now up the other side.
Category: HP 1 Drills
Tags: Play has to develop quickly so the pass back to the coach happens before red line.
Posted By: stars
(Used in 0 Plans)
Created: 2018-01-06, Last Modified 2018-01-06
 |