Dzone Coverage
This drill was created using HockeyShare.com's Online Drill Drawing & Practice Planning Platform.
Description
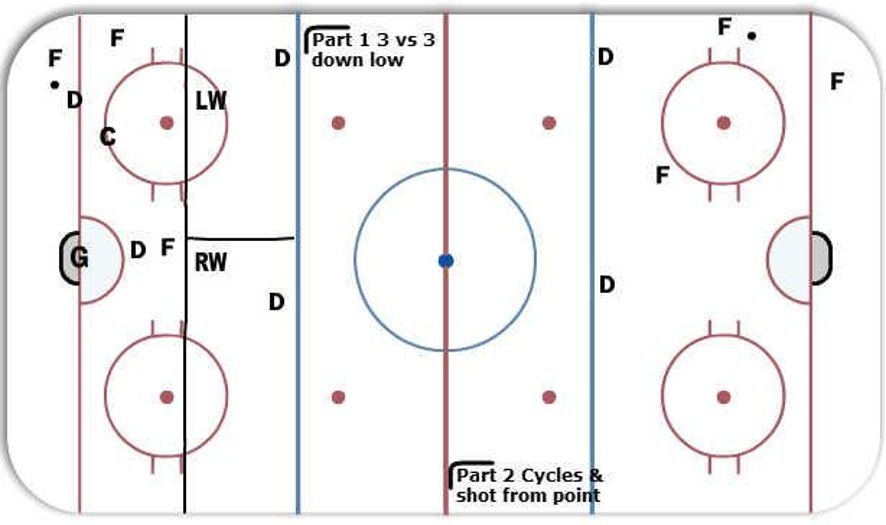
Part 1 - Play 3 on 3 down low. One team is on offence and the other team is on defence. Wingers on Defence can not come in below the tops of the circles when the other team has the puck. When their team gets the puck they can release and get open for a pass to breakout.
Part 2 - After a breakout, they head down to the other end and cycle the puck with each player touching the puck twice. On the last cycle, move puck to D men at the blue line. D make a partner pass and 2 forward go to the net and one stays high and D take a shot or pass to High forward for shot. Repeat on other side.
While this is going on the other lines are doing the 3 vs 3 in the other zone.
Notes: A lot of game like situations occur in this drill.
 |