Ping Pong 1 on 1
This drill was created using HockeyShare.com's Online Drill Drawing & Practice Planning Platform.
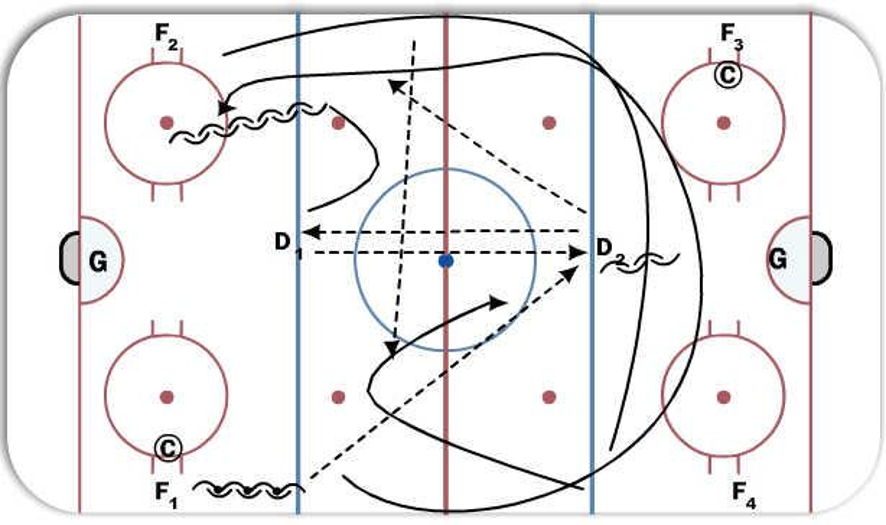
Description
F1and F2 leave with 1 puck b/w them. A pass gets made at the near Blue to the far D. The two F continue and regroup behind the D who are playing ping pong in the neutral zone until they can pass it back to either F1 OR F 2 (does not matter). Whichever one gets the pass back they back down 1 on 1 against the D who didnt make the pass while the other F regroups again in the neutral and gets a pass from a coach along the boards and does a 1 on 1 heading the other direction against the other D. This switch up gives the D who makes the pass some time to reposition and gap control on the F getting the pass from the coach.
Notes: D should be moving back and forth and as they make better passes look to add a pivot or escape move before making that pass. Forwards swing low enough to give the D time to make a few passes but also in order for them to give you the puck earlier after your first regroup. Both 1 on 1's the D need to try and step up as close to the forward using good gap control whenever possible.
 |