2 on 1 Backcheck Curl
This drill was created using HockeyShare.com's Online Drill Drawing & Practice Planning Platform.
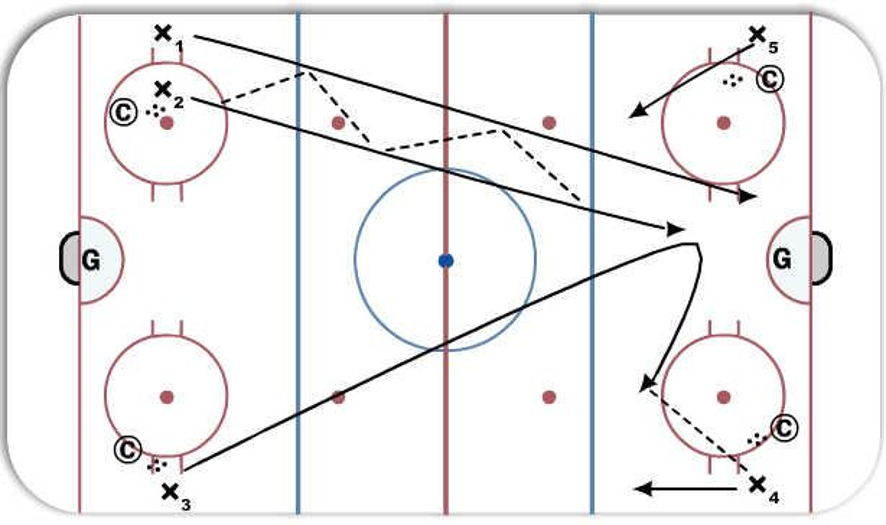
Description
F1 and F2 leave from same corner and pass puck back and forth playing 2 on 1 with D1. F3 is the starting backchecker and when they get to the top of the circles and hash marks they curl to one side and pick up a player who is waiting with a puck. F4 makes a pass to F3 and now they play 2 on 1 against D2 and F5 leaves the corner only after the 2 on 1 has evolved and backchecks going the other way.
Notes: Important as BC approaches the ply they communicate with D as to who they have so the D can adjust. Coaches make sure if your line is BC that they dont leave too early and it becomes a 2 on 2 rather then a 2 on 1 with backchecker.
also use as a 2 on 2 battle drill if backchecker makes it back and still no goal then let it play out for a bit then blow whistle if no goal and have the original BC still curls and picks up player while other side becomes BC.
 |