Blue 2 on 1
This drill was created using HockeyShare.com's Online Drill Drawing & Practice Planning Platform.
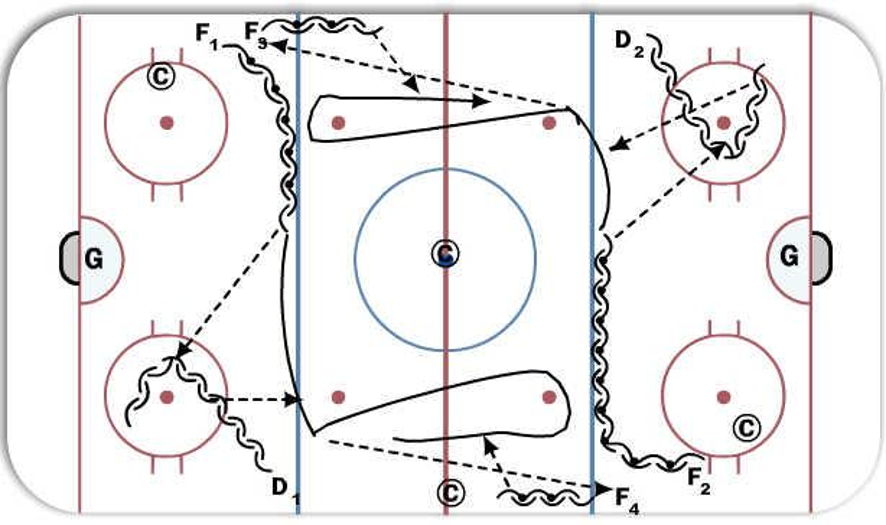
Description
F1 and F2 leave with puck from opposite sides and dart across blue. At same time D1 and D2 are back peddling trying to get close to dot. F make a pass to D who pivot around the dot (figure 8 pattern) and give puck back to that same F. F1 then turns up ice and passes down to F3 waiting in line. F3 waits until F1 does a button hook or tight turn around the Dot or even lower and they come back 2 on 1 on that D who jumps up in neutral and closes the gap. Same thing on other ice as D1 defend F2 and F4 going the other way.
Notes: Great for quick turn overs in Neutral whereby D need to react and close gap quickly without a lot of time and for F who need to transition quick from D to O. Make sure F3 and F4 dont leave too early. You want them to make a pass back then catch up so puck comes in O zone with speed and in middle lane (more options then).
 |