O Zone Support Drill (Support Drill #3)
This drill was created using HockeyShare.com's Online Drill Drawing & Practice Planning Platform.
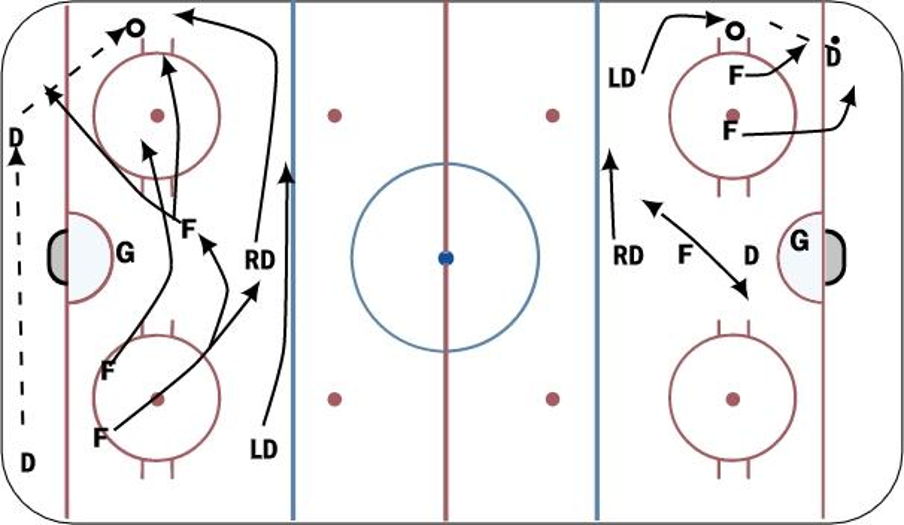
Description
D in the corner start with the puck and make a D to D pass and out to winger. Offensive D support by pinching down the wall in the O zone. F1 hard on D or puck; F2 down to the inside of the face-off dot to force up the boards. F3 enters zone high and reads play. D on strong side don't hesitate, as soon as you see play unfold up the boards pinch down and breakout up pass or play to cause a turnover. D partner slides to cover pinching D and F3 reacts to play. If D pinches they stay back off ready to takes sliding D's position on the point; if we win the first battle low they look to get open and call for pass or drive net. If we win battle on boards come half way from high slot and blue line and call for pass or drive net. If puck does go D to D or behind net see left side of diagram as we respond by F3 becoming F1 and F@ staying as F2 but gets over quickly and supports F1. The RD slides across and down to pinch on other side while LD slides to take RD position. F3 (F1) jumps out of the corner and reads play and first thought is Defence so they start heading back to take LD position but always watching play unfold. If we are win the battle along boards they go to high slot and call for pass or drive net.
 |