PK D Zone (BOX)
This drill was created using HockeyShare.com's Online Drill Drawing & Practice Planning Platform.
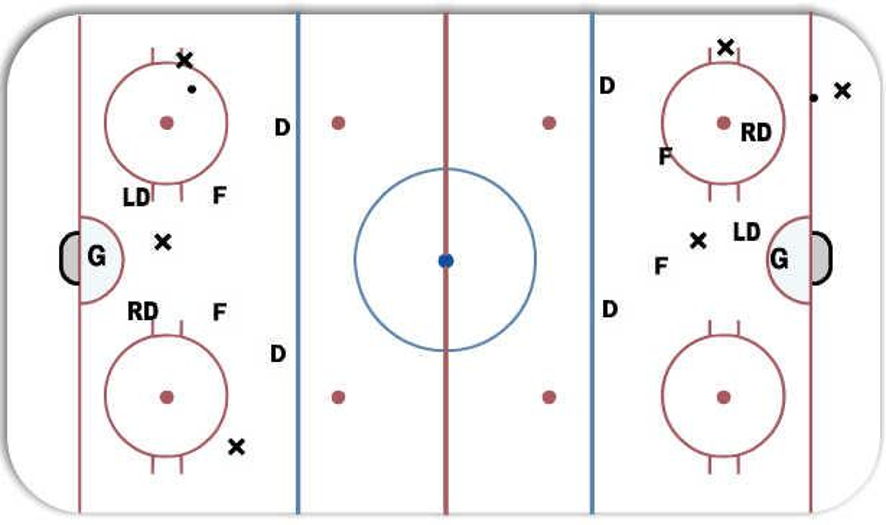
Description
Two forwards (works best with left shot and right shot with sticks on inside for both F and D) The BOX is formed by the two D on the bottom and the two forwards on the top. The above diagram shows when the box works the best and sometimes as on the the right side of the diagram the box shifts to a diamond. Players should have one hand on the stick and be ready to move fast (up, back; side to side etc) Head on a swivel and get in the lanes. If puck comes back to D the F on the strong side needs to challenge BUT NOT like its a 5 on 5 but still get out there and fill the shooting lane with the opposite F backing off to help protect the middle. If they go D to D then the two forwards switch with always one up in the lane and the other one back to help D clear middle.
Notes: If they play an umbrella type PP then we should switch to a Diamond PK from the top. One F high in the middle lane and one left (RS) with one D to the right (LS). The remaining D is directly in line with the top of the Diamond BUT making sure not to screen goalie.
 |