Offensive Atttack 3 on 2
This drill was created using HockeyShare.com's Online Drill Drawing & Practice Planning Platform.
Description
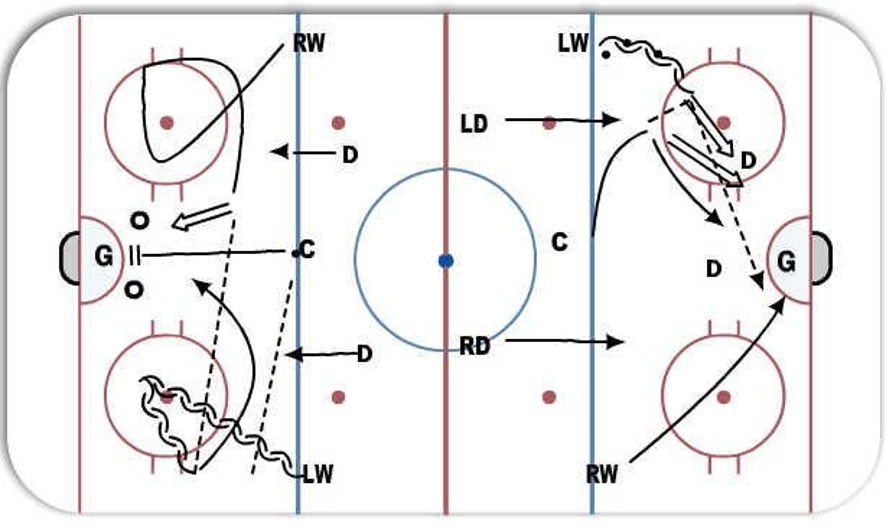
Option #1
RW or LW have the puck at blue with speed (C supports by shifting over slightly) this betters the ankle for a drop pass from puck carrier. If the puck carrier draws the D over and down low the passing lane to C should open up but C needs to be calling for puck before top of circles. As soon as puck gets there quick release at the net. OR the far winger who is driving the net gets between the D and calls for a back door pass. Lastly, winger with puck sees nothing but knows they need to get puck on net so they take low shot (hopefully inside the dot) at far pad and winger driving the net or late middle lane drive bangs in the rebound.
Option #2
Center lane drive. puck goes in wide and middle lane drives net with hopes of getting both D to collapse. The winger carrying the puck does a delay move low towards the wall to throw off D, as does the wide weakside winger who appears to be driving net wide and the pass is made to that winger in the slot for a quick release. As the passing winger heads down the slot for a rebound or loose puck.
 |