PK Forcheck (2 man down)
This drill was created using HockeyShare.com's Online Drill Drawing & Practice Planning Platform.
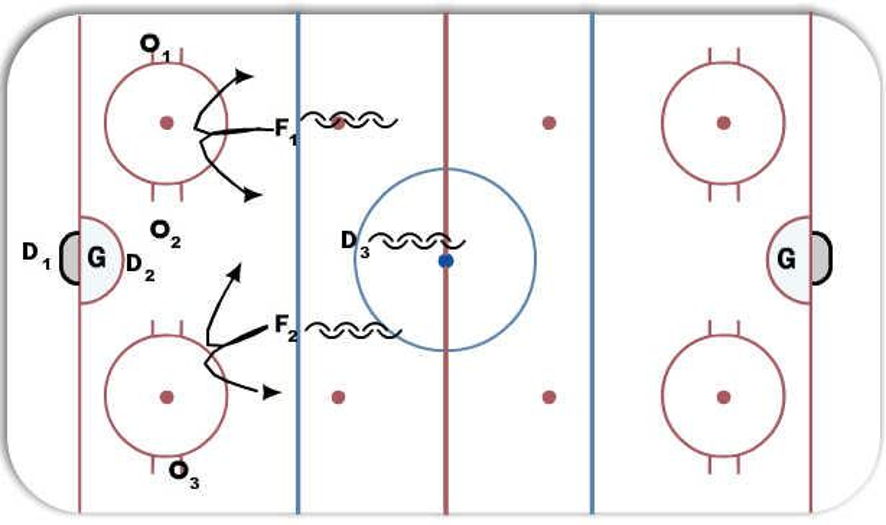
Description
F1 and F2 inside blue line with D outside blue line (high neutral zone). F1 and F2 can apply pressure if they are on strong side but only enough to make them pass and not commit all the way. As one F applies pressure the other one fills in middle lane. Feet always moving and stick in lane. D occupies middle lane all the way back and stops stretch pass and protects slot area from mid lane drives to our net until F1 and F2 get back to set up triangle. Don't want the D to pressure in Neutral zone at all. Don't want Forwards to get caught along the wall anywhere on the ice. Stay free and clear to occupy middle of the ice as well. Don't lose connection with other PK unit.
 |